
Pain L’Ancienne
The Gourmet:
An old friend of mine, let’s call him A, was recently given a three hour one on one cooking class with a local chef for his birthday. Before the class the Chef, Scott Pampuch of Corner Table Restaurant in Minneapolis, assessed my friends skill level and asked him to come up with five questions, techniques, anything really that he would like to learn or be given the answer to during their time together. In an attempt to make the most of this class, A emailed around to some friends, curious to know what they would ask if given the opportunity.
My suggestion was to learn more about bread making. I fear bread making. If I open a cookbook and I see the word yeast, I shut it, put it away and close the pantry door. It’s kind of like my immediate and violent reaction to hearing Norah Jones or Nickelback on the radio. I don’t have the patience, I hate chemistry and I really don’t need to be eating that much bread. Oddly enough I made a ton of bread as a kid and have pretty fond memories of doing so, but for whatever reason fear has replaced all previous memories of loaf love.
Anywho, A mentioned that he had recently been given a Kitchen Aid and purchased The Bread Bakers Apprentice, an impressive guide to bread making tailored to the amateur baker in all of us. Recently he had been making Pain L’Ancienne, a fluffy, crusty French Baguette. He suggested I follow this link if I was feeling especially curious. As luck would have it, my Uncle gave Gourmand and I our very own copy of the Bread Bakers Apprentice as a wedding gift, along with a lengthy editorial on his experience with Pain L’Ancienne.
On Saturday morning, I took stock of myself, gave myself a pep-talk and decided that it was time to big a big kid and if baking bread was what it would take, then so be it.
Slightly modified from The Bread Bakers Apprentice
Pain L’Ancienne
6 cups unbleached bread flour
2 1/4 tsp salt
1 3/4 tsp instant yeast
2 1/4 cups plus 2 tbsp water, ice cold (40 degrees)
Semolina flour or cornmeal for dusting
1. Combine flour, salt, yeast and 19 ounces of water in the bowl of an electric mixer with the paddle attachment and mix for 2 minutes on low speed. Switch to the dough hook and mix for an additional 5 to 6 minutes. The dough should be sticky on the bottom, but should release from the bowl. If it does not release, add a bit more water.
Oil a large bowl and transfer the dough with a spatula or bowl scraper. Mist the dough with olive oil and cover. Refrigerate overnight.
2. Remove the dough from the refrigerator and let rise, 2 to 3 hours at room temperature or until twice its size.
3. When dough has doubled in size:
sprinkle counter with semolina flour and cover two cookie sheets with wax paper:
Place a large knife on ice in the freezer. When knife is quite cold, transfer dough to the counter, trying to de-gas as little as possible while transfering. With floured hands, stretch the dough into an oblong shape, roughly 8 x 6 inches. Take the knife from freezer and cut the dough in half by pressing down, not sawing. Continue to cut halves into three equally shaped strips and then slash the tops of those strips as below:
If your lucky and patient the final product should look like this:
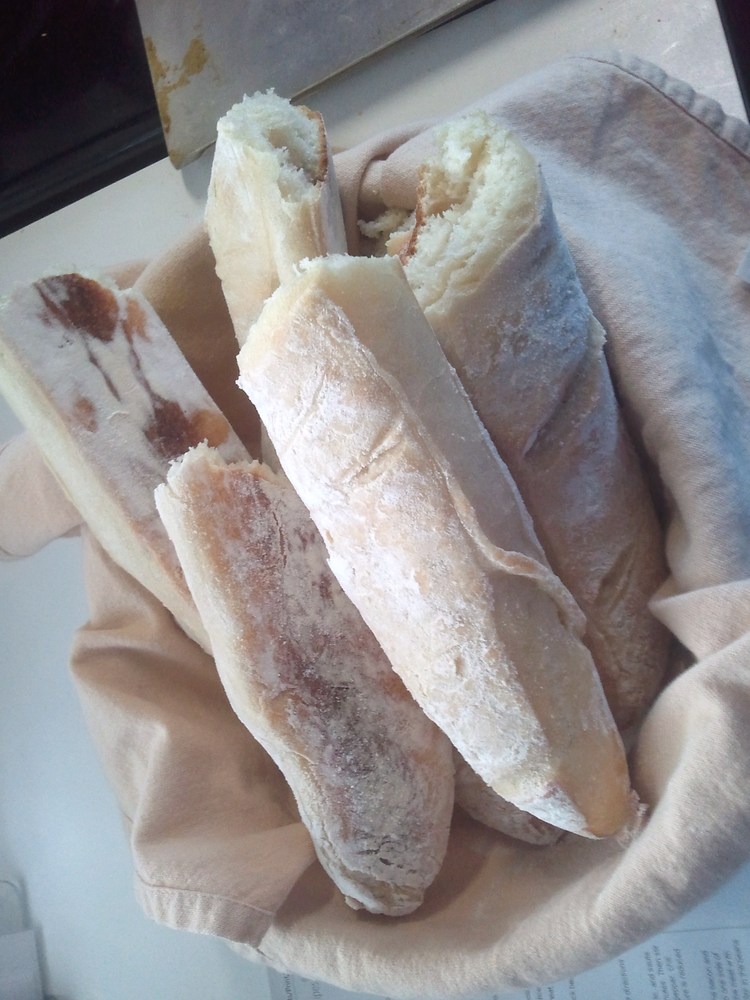
So I guess it turns out that bread isn’t so scary after all. It’s a bit time consuming, but most of that time is inactive, and I suppose that it can be fairly intimidating when you sit down and read the recipes, but overall it was a great experience. I have rarely had such a satisfying cooking experience or an immense feeling of pride of accomplishment as I did when I took those crusty, golden loaves out of the oven. It helped that I had a house full of Super Bowl watchers to brag to and share with, but, regardless of your audience, I would suggest you give these baguettes a try, if only for yourself.